
- Premiere Tutotial
How to Easily Use Lumetri Color Premiere Pro

Dec 30,2019• Proven solutions
Lumetri color is a great tool in making due color corrections over video. In basic sense, the Lumetri Color panel is a space where users can easily execute a simple color grading along with the basic exposure settings. Moreover, you can supervise the color as well as the Lumetri information with the parameters of waveform and vector scopes featuring in the Lumetri Scopes panel.
So if you are looking to burn the midnight lamp, we are here to master you with the art of duly using Lumetri Panel featured in the Adobe Premiere Pro, including creative, curves, color wheels, HSL secondary and vignette.
- Part 1: Lumetri Color panel in Premiere Pro
- Part 2: Alternative to lumetri color panel in FilmoraPro
Part 1: Lumetri Color panel in Premiere Pro
Adobe Premiere Pro is a renowned tool famously known for its advanced feature of Lumetri Color Panel. This video editing software is useful in crafting frames, editing and adjusting the colors etc. It provides a pool of functions like Curves, Vignette, HSL secondary which we will take up in the upcoming session.
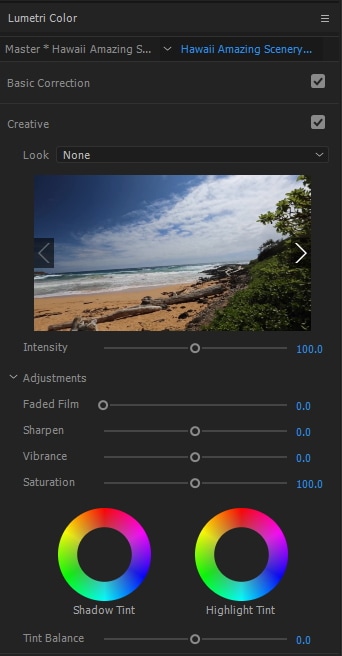
1. Creative
It is not necessary to be a pro or a master for working with the Lumetri Color panel. There are indeed several manners with which one can make a lit picture. To give wings to your imagination, the Lumetri Color panel is certainly a major part of the LUT. With Creative Tab, users can enjoy applying creative streak of LUTs or “looks” over the desired frame(s). It is coupled with its own set of sliders that are inclusive of Faded Film, Sharpness, Vibrance as well as managing saturation levels. You can make adjustments accordingly by making use of the intensity slider to increase or decrease the amount of look.
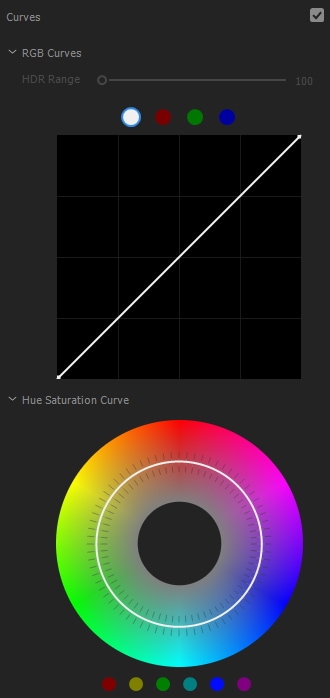
2. Curves
Curves is one of the advanced options rendered by Adobe Premier Pro. Mainly, there are two kinds of curves. One that is associated with managing the tone of frame with infusing the luminescence curves and can work over separate line of channel curves. The other one is quite common, the Hue/Saturation Curve following under the category of red, green and blue (RGB) flagship. Making due changes in the same can enhance the video accordingly.
Tip: Always use of “Shift” key when dragging, it will be helpful in not running to change hue either too outward or inward.
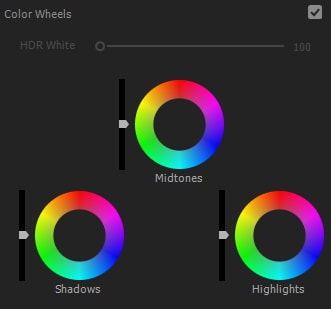
3. Color Wheels
Color pallets stores several kinds of shades for a particular color. You can experience working with the colors and shades and opt for the suitable one. Once you’ve defined the colors nicely, you can make use of the Comparison that will allow you to keep a watch over two frames simultaneously. Match them by employing scopes that can automatically switch to comparison view too. Set referencing frame with a timeline indicator and then tap on Apply Match. Adjustments can be made by adjusting match working with color wheels.
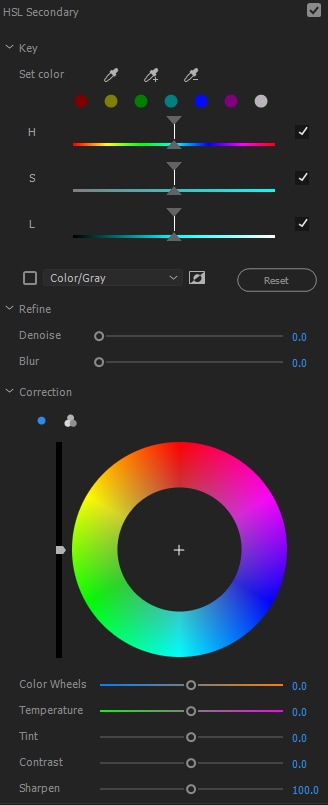
4. HSL Secondary
HSL Secondary function is one of the features of the lumetri color panel that is used forfocusing over a particular subject of the image, frame etc. Users can duly select what all ranges of hue, and saturation levels can be used for duly making adjustments over the lightness. Moreover, manipulating skin tones, refocussing images can be easily used.
5. Vignette
If the frame or clip you are using demands a special kind of attention, then Vignette is something you can consider using. Roll up in the sections, just find sliders for adjusting levels of darkness or lightness. In typical cases, it has little to no use of vignettes. Focus can be made over themid-point, roundness as well as the feathering. Presently, it is not actively used, users opt for the blending modes from the lumetri color panel.

Part 2: Alternative to lumetri color panel in FilmoraPro
When it comes to creativity, one of the sparkling option you can use for firing up the creativity processes is by Wondershare ultra power, FilmoraPro – an impeccably powerful video editing tool one can look forward to. It is imbibed with a splendid Color correction which is capable of giving lumetric picture without having to undergo a ladder of complex procedures. Download it now to have a try (free)!


You may also like: How to Use Color Correction in Premiere Pro and FilmoraPro
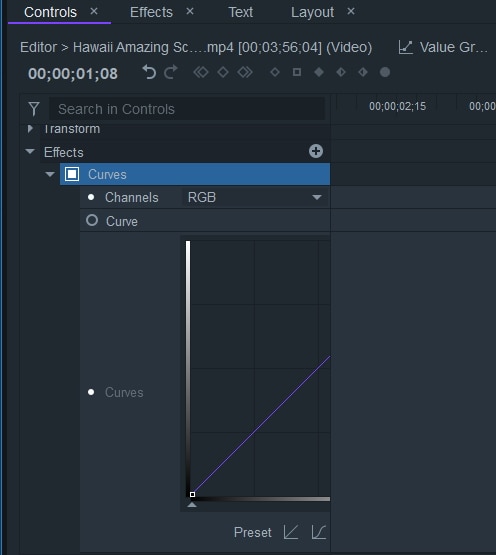
1. Curve section
To make certain degree of manipulations, the Curve Section can prove to be a great option. One just has to dash in suitable parameters, slide the axis of the graphs and set a reward-winning video. It is incorporated with two presets- one that resets graph to a straight linear line, the other one creates s-curve over the graph. The latter is responsible for representing softer contrast by mid notes are levelled up. However, the detailing in the highlights and shadows are coined a bit lower. Typically, it is essential in focusing a person’s face.
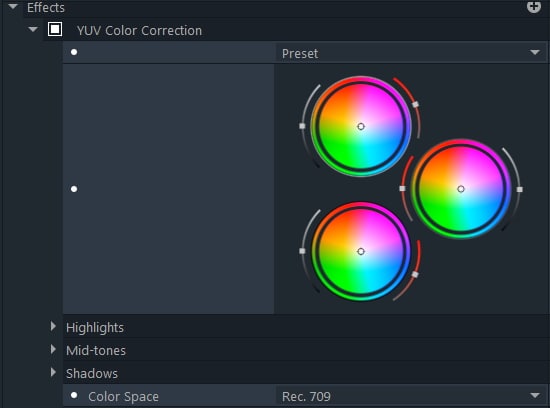
2. YUV color correction
Unlike Adobe Premier Pro, FilmoraPro has a unique feature in its Lumetri color panel that is the YUV tool is essential in making a distinguishing line of tool from brightness of image from color data- the U channel containing brightness data whereas the Y and V channels stores color data displayed over the horizontal or vertical axes that works over the center of the wheel.
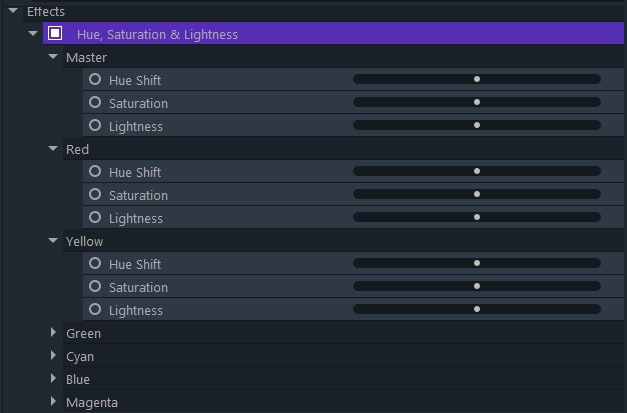
3. Hue, Saturation and Lightness
To master the art of perfection, maintaining suitable levels of Hue, Saturation & Lightness levels. Managing all of them in the right order can allow you to make a holistic video/clip altogether. Here is the detailed parameters explained:
- Hue Shift- Allows you to migrate or shuffle colors by rotating them the color wheel. To make changes over the entire image, ensure to use Master control or else the impact may not be reflected on the file.
- Saturation- It defines the overall intensity of the colors in an image. You can selectively draw impact over the selected color shade too.
- Lightness- If the concerned image or frame is turning too dim or light then adjustments in the lightness values can certainly allow making image look less saturated.
Final Verdict
We hope by now you are well acquainted with the insights on the Lumetri Color, its features and functions rendered by Adobe Premier as well as Wondershare FilmoraPro. If you are in search of an advanced tool that is capable of providing you impeccable line of features, then FilmoraPro stands as the viable option for you. Its streak of color correcting functions is far more fantastic than the former and can be used to yield a jaw-dropping video. Feel free to share your thoughts in the comments section below.
Bring up your video to a professional level with straightforward tools.
Try It Free Try It Free
Benjamin Arango
staff Editor
0 Comment(s)